Radiant

When we agreed to accommodate the additional cost of radiant in our budget for the addition, we reviewed some online plans and projected cost based on that information. That budget number wasn’t enough to cover the cost of the two-inch insulation. What we thought would be a fairly straight-forward installation process turned out to be a goat rodeo.
There are five core reasons why it was challenging to complete radiant for this stage of construction:
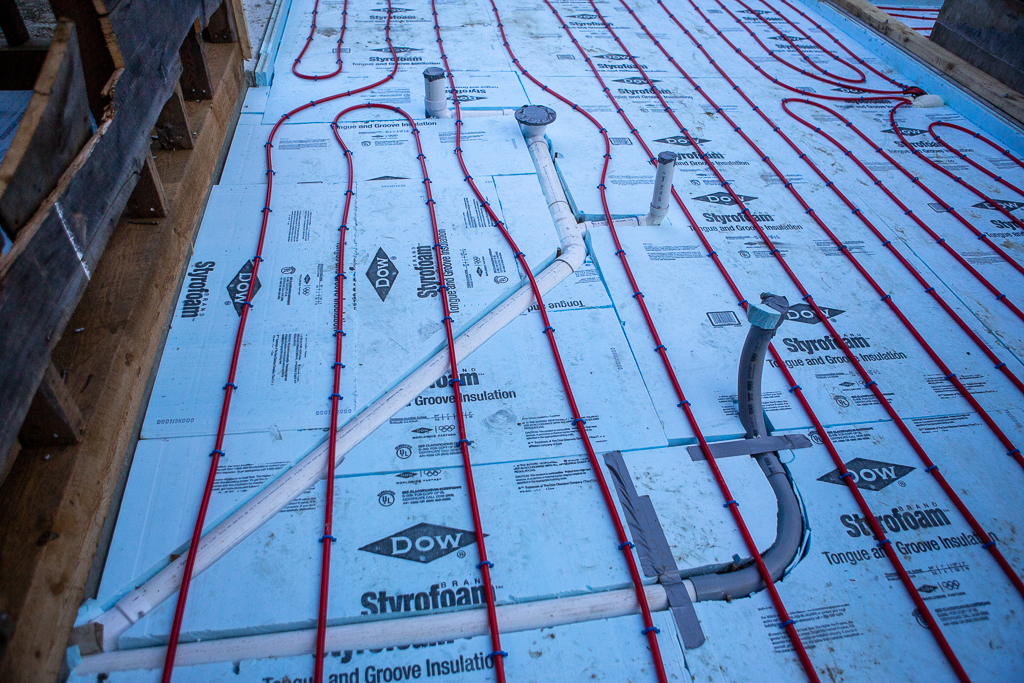
- Type of tubing: There are several types of PEX (stands for cross-linked polyethylene) and sizes of tubing, each with its own attributes such as kink-resistance, flexibility, and bursting pressure. We went with 1/2″ oxygen barrier PEX tubing.
- Type of system: There are different types of fuel, a host of boiler options, and whole-house systems that could include hot water for the house and maybe even heating. Many sources suggest we’ll know more after our engineering review (which we do not have the luxury of doing). We simplify this by agreeing to go with a dedicated standalone closed loop system with two zones, one for the slab in the entry/sunroom and the other for the garage.
- Availability and price: Once we settled on a size and type, it was not easy to find a reliable source for the specific pipe we chose and the price range was broad. In the end, we narrowed it down to two online resources, both with a physical Vermont location — HouseNeeds and Radiantec.
- Installation road map: It seems like everyone has an opinion on how radiant should be installed and, while these perspectives are sometimes similar, when they diverge it’s often in radically different directions. Talking through plans with others, from plumbers to supplier customer service, few clear paths emerged. Our local builder was mostly familiar with the mechanics of installation, but could not provide guidance on the big picture that included components, such as the type of boiler.
- Rent versus buy: Obviously we purchased the tubing, but there’s a large tool, a foam stapler, that we decided to rent (what the hell would we use it for after this project?). We found two sources and went with the plumbing supply business that provided the stapler for free when we purchased the plastic staples from them.
Since each installation is unique and comes with a variety of variables, we elected to let logic play a role in how things came together. We assemble information from locals who have worked on jobs that incorporated radiant and merge those findings with suggestions made by radiant suppliers. We feel good about those decisions and discovered some universal truths:
- Keep radiant tubes a foot or more away from any commode location; the heat will melt the wax seal
- Areas where the tubes are closer together will be warmer
- Protect and label the tubes that will eventually connect to the manifold
- Don’t skimp on staples
- Insulate the sides of the slab to avoid frost walls leaching heat
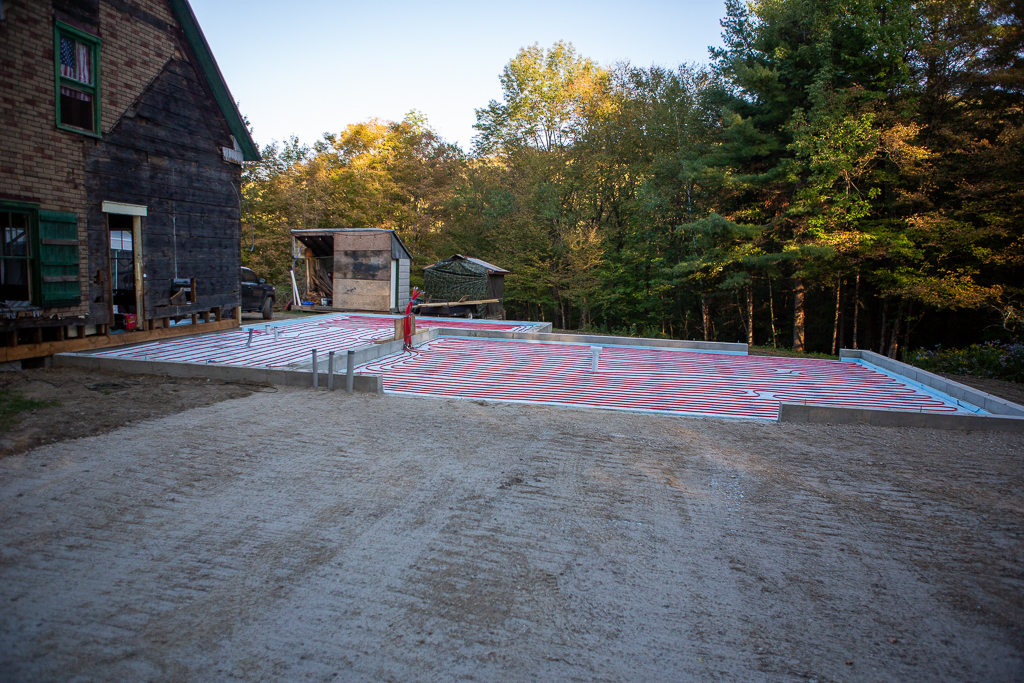
Why heat the garage? There’s a school of thought that goes something like, “Adding radiant now is not that expensive so why not have the option to heat the floor later?” Once we started purchasing materials, we realized “not that expensive” is relative. Separating the garage into its own zone will provide the option to heat the floor, but if we’re serious about that then the garage will need to be insulated, and that’s a whole new expense category.
For now, we hustle to get everything buttoned, or stapled, down before the foundation crew arrives to pour the slabs.